C2 PROJECT
C2 Project News
February 2026
February 2026 working party reports
Much as achieved that the February 2026 working party with Andrew, Dave 1, Erle and Bobby in attendance. Read b below to see what we got up to. In addition, Andrew and Chris were able to put in a few more days towards the end of the month. Details are at the bottom of this working party report
As usual, the working party started with Breakfast.

View from Andrew's livingroom window on the first day of the February working party while eating bacon and egg sandwiches for breakfast! It's difficult to get bored of this view.
Cylinder Lateral alignment measurements
At the December working party, Dave and Erle had attempted to determine the lateral alignment of the cylinders and slidebars relative to the driving crank pins. But since the siding in the C2 Shed is curved, there was a concern that the wheelsets were not necessarily centred in the horns, which would upset the results. What we needed was to move the locomotive onto straight track.
The start of the working party, on Saturday morning, saw a break in the weather, with sunshine replacing the almost continual rain of the previous weeks. It therefore seemed like an ideal opportunity to move the C2 from its shed. Andrew fired up the Castle Aarghhh diesel shunter and used it to drag the C2, complete with tender coupled in front of it, from the C2 Shed and onto the straight track in the carriage shed next door.
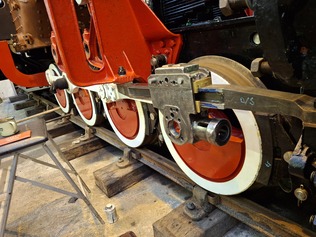
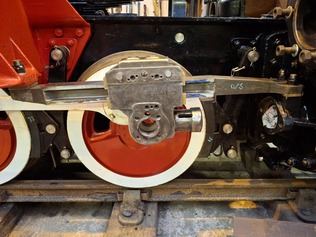
Matt had suggested using a winch to pull the rear of the engine sideways, to try and force the wheelsets across in their horns. With the winch anchored alternately to the rails of the adjacent track or the shed pillars, the rear of the engine was pulled from side to side. Measurements were taken each time using a long parallel bar clamped to the side of the slidebars and measuring the gap between it and the axle 2 coupling rod bearing cover plate.
Oddly, although we could clearly see the rear of the engine moving when the winch was used, we didn't measure any significant movement of the cylinders (on the engine) relative to the driving crank pins (on the wheelsets). Actually, we were measuring to the coupling rods rather than the crank pins, so perhaps the coupling rods were moving relative to the wheelsets.
The above procedure was repeated, this time also taking measurements between the coupling rods and the wheel hubs. This showed that a small amount of movement was occurring at this interface, but not enough to explain the anomaly we were seeing.
Next time Erle used the winch, Dave stood back and watched from a position where he could see the whole engine. Quite unexpectedly, the wheels were sliding sideways across the rails. That explains why we didn't measure much movement between the cylinders and the driving crank pins! A different approach was clearly needed.
Most of the curves in Boston Lodge yard are right handed when looking "uphill", including that in the C2 Shed. This tends to bias the middle wheelsets (axles 2 and 3) towards the fireman's side of the locomotive. However, there are a few sidings near Boston Lodge Curve which have left hand curves. So it was time to fire up the Castle Aarghhh again and take the C2 for a tour of Boston Lodge yard.

With snow on the mountains, The C2 was moved round to one of the few left hand curves which exist in Boston Lodge yard. - Andrew Nelms Feb 2026
By this time Erle and Dave had got got quite slick at setting up the parallel bar and taking measurements to the driving crank pins. So it was possible to take multiple measurements with the engine on left hand curves, straight track and right hand curves. With all this information, we were convinced that any cylinder alignment issues were real and not down to measurement error.
It does appear that the cylinders and slidebars are slightly misaligned relative to the driving crank pins. We were very careful to set up the cylinders and slidebars parallel to each other, so we can only attribute the discrepancy to a slight angular (yaw) error in the cylinder mounting faces. Because the driving crank pins are about six feet away from the cylinders, even a tiny angle will result in a noticeable offset at the driving crank pins. Whilst frustrating, we are happy that we have found out what is going on, as we can now compensate for it.
Cross heads
Prior to this working party, Andrew had used the measurements of the gaps between crosshead slippers, taken at the previous working party, to calculate how much material needed to be removed from the top slippers. The faces between top and bottom sippers need to be parallel, so different amounts of material need to be taken off each corner to achieve this.
With the Archdale milling machine in use, Andrew looked to use the Chinese CNC milling machine instead. But a quick measurement of the bed of the CNC milling machine suggested it was not perfectly aligned, and was outside the limits of tolerance which we are aiming for. The Wanderer milling machine, while being much older, seemed to be much more accurate, so Andrew set the job up on that machine.
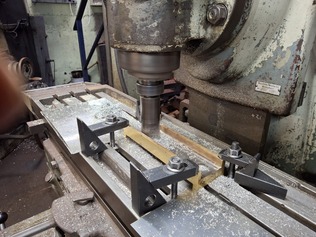
It took Andrew several hours to carefully set up the fireman's side top slipper, with the sides of the slot parallel to the bed of the machine and with the required packing under each corner. After a final check, a cut was taken to machine the bottom of the slot. The workpiece was then removed from the milling machine and assembled onto the crosshead such that new measurements of the top to bottom gap could be taken. This showed the top and bottom surfaces to be parallel, although there was still some material to come off.
Milling the top cross head slippers using the "Wanderer" milling machine. Each corner has been carefully packed with shims such that when assembled with the bottom slipper in the cross head, they will be exactly parallel to each other. - Andrew Nelms Feb 2026
The packing on the milling machine had not been touched, so Andrew found it relatively easy to place the workpiece back in place. More clocking with the dial test indicator showed that the workpiece was correctly mounted. Andrew could then deepen the slot to the final dimension.
Taking the top slipper back to the C2 Shed, it could be fitted to the crosshead in place on the slidebar. Using feeler gauges, Andrew and Dave determined that there is about 5 thou of clearance top to bottom. This is marginally less than that specified on the drawings, but we decided not to carry out any more machining. The extra clearance required is little more than we can machine accurately, and will wear in quickly when we get the connecting rods on. With a little lubricating oil on the slidebar, the crosshead easily slides nicely along it, which is very pleasing.
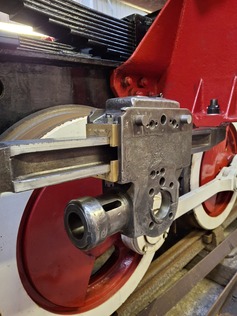
The fireman's side cross head assembled on the sidebar. It is always pleasing to see the results of a complicated machining job coming together! - Andrew Nelms Feb 2026
The fireman's side cross head slides easily up and down the cross head with the clearances machined to the correct tolerances. Andrew Nelms Feb 2026

The driver's side top slipper was dealt with the same was as the first. For some reason, the first cut did not result in the bottom of the slot being perfectly parallel relative to the bottom slipper, but there was enough material to be able to correct this. After some further careful measurements, the final cuts resulted in the top and bottom of the slot being perfectly parallel and at the correct spacing. By this time it was almost 6pm on the final day of the working party, so we have not yet tried assembling the driver's side crosshead onto its slidebar; something for us top do at the next working party.
Expansion Links
The expansion links have been retrieved from Llanfair Caereinion, where Aaron had kindly drilled the bolt holes in them for us. The holes are still slightly undersized, so that we can run a reamer through them. To aid that process, Bobby turned up some stepped dowels to locate the cover plates on the expansion links.
The trunnion sleeves are now fitted to the expansion link cover plates and are machined to their final diameter. Dave had previously machined the motion bracket plastic bushes which hold the expansion link trunnions, but the internal bores were a little undersized. He therefore mounted each bush on one of the DSG lathes and bored out the inside, half a thou at a tine, until the bushes slide nicely over the trunnion sleeves.
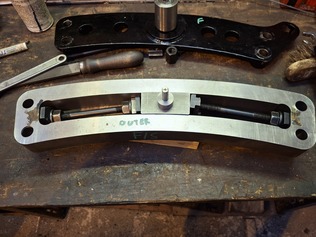
Measuring the reverser weighshafts to the expansion link bearings
While searching for the aforementioned bushes, Dave had found the jig which he had started to make for measuring the reverser weighshaft crank pins relative to the expansion link bearings. The jig was still a little oversize to fit into the holes in the motion bracket, so Bobby was tasked with making it fit snugly. After some careful work by Bobby, the jig now fits perfectly in the pivot holes, with no discernible clearance.
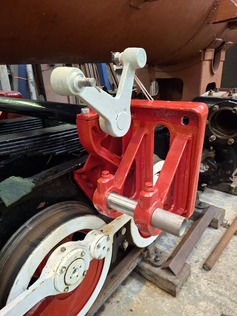
Jig for measuring the reverser weighshaft crank pins relative to the expansion link bearings. Andrew Nelms Feb 2026
Dave was keen to measure the relative positions of the reverser weighshaft crank pins and the bearing centres of the expansion links, since he had found that the lifting links are different lengths (by about 3mm) each side. Was this intentional or just poor machining of the original components? With the jig now finished, Dave and Bobby took measurements between the crank pins and the jig each side of the engine. These measurements suggested there is little difference (about 0.5mm) in the centres side-to-side.
The lifting links hang almost vertically from the crank pins on the reverser weighshaft, while the measurements Bobby and Dave took were the diagonal distance. This means that the measurements could be affected by a longitudinal error being masked by a vertical error. Bobby suggested setting up a parallel bar horizontally on the jig, to measure the vertical position of the crank pins on the weighshaft. By trigonometry it would then be possible to determine any longitudinal error.
Resting the centre of a 18 inch straight edge on the jig (located in the expansion link bearing holes) and one end on packing resting on another part of the motion bracket, the other end of the straight edge is under the lifting link crank pin. The straight edge was set horizontal by careful use of an engineer's spirit level. A vertical measurement could then be taken to the crank pin on the weighshaft. The same set-up was then used to take an equivalent measurement on the opposite side of the engine.
The vertical measurements also came out very similar; within 0.5mm of each other. This indicates that the geometry of the reverser weighshaft and the bearing centres of the expansion links is essentially the same on both sides of the engine. Logic would then say that the lifting links ought to be the same length. Dave inspected both lifting links, and will decide if we need to remake one or both of them.
While measuring motion parts, Dave also checked the union links. While the length of these is about correct, the recesses into which the ball bearings push appear to be oversize, so we will have to do something about them too. The links are not complex, so it may be easier to make new rather than try and repair what we have. Something for us to think about.
Reverser latch plate
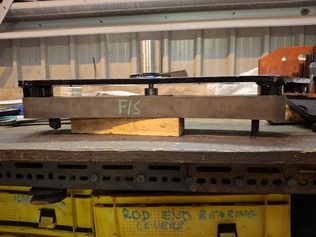
Although we occupied Erle for a day taking measurements with Dave, Erle has not forgotten about the screw reverser which he is in the process of overhauling. We have purchased a short length (most likely someone's offcut) of large diameter steel of a hard grade (EN24), suitable for making the reverser indexing wheel. Erle started by cutting it down in length, and has now started to turn it to its final dimensions.
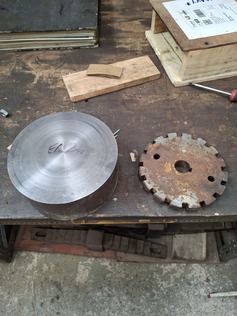
Old and very worn screw reverser latch plate (right) and the new off cut of EN24 steel which will be used to make new. Andrew Nelms (taken) Sept 2026
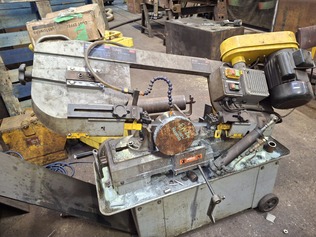
Cutting the EN24 steel down to a more manageable size prior to machining. Andrew Nelms Feb 2026
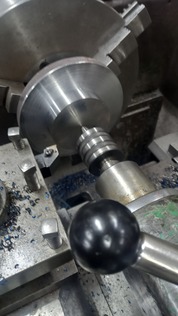
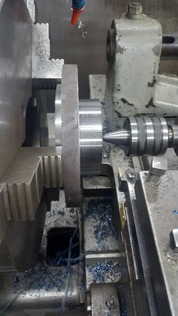
Erle making the new screw reverser latch plate on the lathe. - Erle Ford Feb 2026
The reverser latch (which engages with the indexing wheel) was badly worn, so Andrew applied some weld to the worn areas to build them up. This is now ready for Erle to machine at a future working party.
Return cranks
While Andrew had the welding kit set up, he used it to build up the badly worn rear faces of the return cranks. The grease nipples on the connecting rod big ends had never been fitted in China, so it is unlikely the interface with the return cranks was ever lubricated! We will machine the built up faces at a future working party, to start restoring the return cranks.
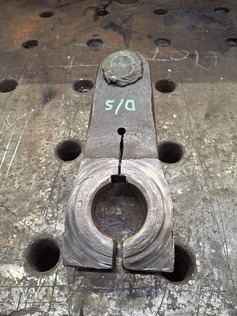
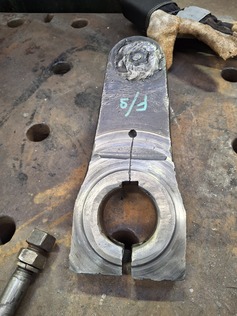
Driver's side return crank badly worn. Andrew Nelms Feb 2026
The Fireman's side return crank is no better. Andrew Nelms Feb 2026
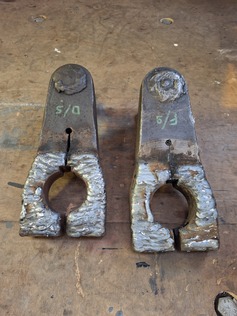
The worn areas on the return cranks build up with a layer of weld ready to be machined back at a future working party. Andrew Nelms Feb 2026
C2 Extra working party late Feb 2026
Andrew and Chris were able to put some extra days in at Boston Lodge towards the end of Feb 2026. On the Sunday while Andrew attended the footplate crew's annual MIC (Mutual Improvement class), Chris worked out how to hold the the new die block in the expansion link in the exact mid gear position (which is not in the middle!). This was achieved by using studs and nuts from a milling machine clamping set.
The purpose of this is so that the expansion link carriers can be fixed such that the pivot is on the same axis as the mid gear position. When Andrew returned on the Monday following the MIC to work with Chris, he drilled a centre on the rear of the expansion link carriers and turned a couple of dowels to centre the die block on the carriers.
New expansion link with the die block held in the mid gear position and two dowels to centre the exansion link carriers such that the pivots are exactly in line with the mid gear position. Andrew Nelms Feb 2026
Expansion link carrier centred on mid gear position of the expansion link. Andrew Nelms Feb 2026
The trouble is that having done this, the holes in the expansion link carriers are not in line with those in the expansion links. Also the existing holes in the carriers are somewhat oval. This is a problem.
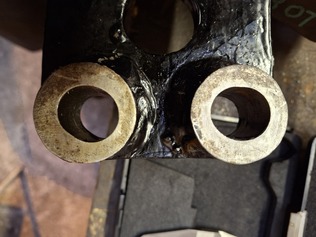
Mounting holes in the expansion link carriers which are not very round! Andrew Nelms Feb 2026
The solution to this was discussed with Marek in the machine shop and it was suggested that the nominal 18mm oval holes were drilled and reamed out to 24mm and then plugs machined and welded in. Andrew then spent the next couple of days doing this.
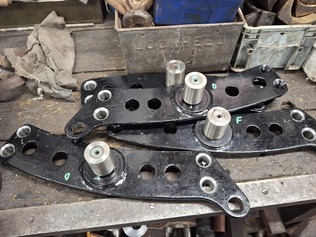
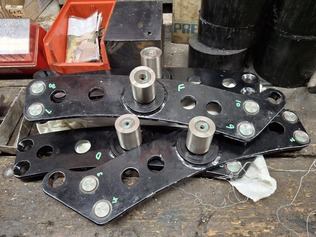
Expansion link carries with the mounting holes drilled out to 24mm and with weld preps countersunk. Andrew Nelms Feb 2026
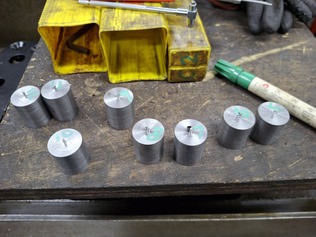
New 24mm plugs machined out of EN3 to give a 1 thou interference fit. Andrew Nelms Feb 2026
Before Chris had to leave, an opportunity was taken to trial fit the drivers side cross head (after the fireman's side was trial fitted earlier in the month (see above in this report). A similar fit was observed so this job is considered a success.
Driver's side cross head trial fitting! Andrew Nelms Feb 2026
A sliding fit on the Driver's side cross head. Andrew Feb 2026
All in all, despite a slow start to Jan (mainly because Andrew keeps going to the alps skiing!), much as been achieved this month. Much more is planned for March!